
I’ve wondered how to build a deck for years! So I set about learning how to build a deck step by step and took pictures during the process.
To build a deck, start by:
1. Placing concrete deck blocks about every 3-5′. They don’t need to be level with each other but should be level with the ground, so shovel the ground as needed.
2. Place 4×4 posts in each concrete block going up
3. Run 2″x6″ between the 4×4 posts & cut off any excess post above the level board
4. Run wood braces between the 2×6 boards
5. Attach deck boards running opposite the 2×6 boards
6. Stain
Make no mistake, my friend Dave, who had done it before, was the brains of the operation. But in helping him, while he is certainly VERY skilled, I came away realizing just how easy it would be for most folks to build a deck too.
So in this post, I’m going to detail everything involved in how to build a deck step by step with pictures.
(Best Diy Crafts Ideas For Your Home : Tips on wooden deck materials and finishing (and refinishing!)) https://t.co/I6ljjE74Zc | Your daily source of DIY ideas, Craft projects and Life hacks – https://t.co/FNeMro7bus pic.twitter.com/X7DaYXfCBC
— DIYpick (@DiYpick) January 6, 2018
Yes, you can get fancier.
You could add fancy railings. And you could have multiple levels, etc. I’m not a master carpenter. But I can tell you that a somewhat basic deck has transformed our backyard into someplace we love to hang out now. It’s also a great way to increase your home’s value.
That was not the case before I decided to build a deck.
Ready to build your deck? Jump right to my recommended tools and supplies page (click to see it)! I only recommend the very top-rated tools and items, taking the worry and hassle out of figuring out what to buy.
You can get everything you need quickly and easily by ordering on Amazon or pre-ordering with Lowes or Home Depot and having it ready for pickup.
How long does pressure-treated wood last?
When wood rots, it’s usually an issue with moisture.
Typically when you buy lumber at a Home Depot or Lowe’s, it’s treated lumber. To pressure treat lumber, companies inject a preservative into the wood. That is designed to resist rot, fungus, and termites.
However, it doesn’t make wood water-resistant. So pressure treated lumber still soaks in and loses moisture depending on the weather. Over time, this causes pressure treated lumber to move, crack, and bend.
So, once your deck is done, while you can leave it natural, applying a water-repelling stain will definitely help your deck last longer.
In terms of how long the pressure treated wood will last, many companies offer lifetime warranties. But the reality of you remembering which brand of lumber you bought 10 years earlier, having the receipt and trying to get compensated for some rot in your deck is fairly unlikely.
That being said, 15 to 20 years is about right for most decks.
The range will be based on how much direct sunlight the deck gets, whether you’re near the ocean and the damaging effects of saltwater, or if your area gets more rain than normal.
Can I build a deck directly on the ground?
Yes is the short answer.
In some cases, if your back door is low to the ground, a ground-level deck may be your only option. Do make sure that any wood that comes in contact directly with the soil is pressure-treated to resist rot. But avoid actually burying wood in the ground.
Contrary to popular belief, the issue with wood touching ground isn’t with the wood getting wet. It’s with the challenges that come from the wood not being able to dry well.
One of the benefits of a ground-level deck is that you can avoid having to use:
- Guardrails
- Stairs
- Posts to raise the deck from the footings
You also want to make sure there is enough space between the deck and the ground to allow airflow. But having footings on the ground, and then joists, followed by your deck boards work just fine.
Do you need a permit to build a deck on the ground?
Most likely no is the answer here.
Of course, every city, county, or state in the US may have different building codes. If you live in a neighborhood with an HOA, they may have specific rules too.
So it’s always a good idea to check with them before embarking on any building project.
That being said, the International Residential Code, which most states in the US follow, your deck (above ground or not) will not need a building permit if it is
- Less than 200 square feet
- Under 30” off the ground
- Does not serve a required exit door
- Is not attached to the dwelling
When I built my deck, while it was not a ground-level deck, it wasn’t attached to the house, and chances are yours won’t be either.
What happens if you don’t get a permit for a deck?
In most cases, probably nothing.
That being said, you should always consult your local building inspector’s office and find out what may be required. But the likelihood of them finding out about your deck (which is most cases won’t be visible from the street) is fairly small.
After all, in many cities, you are technically supposed to get a permit even to replace a ceiling fan and I’m guessing thousands of people do that every month by themselves.
Now if you’re adding extensions to your home without a permit or turned your garage into another bedroom without a permit, when it comes time to sell your home, you could run into issues, since that additional square footage won’t be on any official record.
But in most cases, a deck would never be included in the square footage of tax records.
The biggest consequence of building a deck without a permit would be if a building inspector happened to drive by your house and saw construction or unloading of a large quantity of materials, or if perhaps a noisy neighbor bothered to check the building department for your permit and lodged a complaint when that was missing.
In those cases, you would be issued a fine, or in extreme cases, may be asked to dismantle it. Also know that if there was damage to the house, and your insurance company determined your un-permitted deck was somehow to blame, they could try and get out of paying your claim.
So building anything on your house, including a deck, without a permit, is definitely a risk. But I’ve done it twice now (I have moved since living in the home pictured here) and didn’t get a permit either time.
How far can deck joists span?
A deck joist is the cornerstone of the structural part of the deck.
They run longways to form the foundation of your deck with your deck boards often running in the opposite direction on top of the joists. The required joist size is based on how many footings you are using.
Also, know that the allowable span of deck joists is also based on the kind of wood you are using.
2″x12″ pine joists are fairly common for deck building and if you were spacing yours 16″ apart from one another, the total span you should not exceed would be 16’6″.
But other types of wood would not be quite that long, so a span of 15′ is safer for almost any kind of wood.
How long do deck joists last?
As I mentioned above in talking about pressure treated lumber, the average deck will last between 15-20 years, especially when using pressure-treated lumber that has been waterproofed with a sealer or stain.
One trick to make your deck joists last longer is to coat them with a moisture-resistant stain or sealer before you add the deck boards. The color doesn’t really matter since you won’t see much of the framing, but it will help make your joists last considerably longer.
The 2 things that damage wood decks the most are sun and moisture that isn’t able to evaporate quickly. So make sure the underside of your deck gets good ventilation, and you’re likely to see your deck, and the deck joists, last up to 20 years.
Do deck joists need to be treated?
Yes is the short answer.
You could, of course, buy non-treated lumber, which would be less expensive. But since you’ll be spending at least $500 even if you’re doing everything yourself, why not spend just a little more to get pressure-treated lumber?
So my recommendation would be to use pressure-treated lumber for everything on your deck. It will resist rot better, can support more weight, is less likely to warp or shift.
For most deck framing wood, you should look for “ground-contact use” (.40) pressure treated wood unless you are burying the wood partially. In that case, I would use “below-grade (.60) pressure-treated wood.
For things like deck railings, and deck boards, you’ll be fine with “above-grade use” (between .15-.25) pressure-treated lumber.
How much does it cost to build a deck DIY?
The key to making this less costly was to not pour concrete. You could trench holes, buy, mix, and pour concrete, but in my experience, these inexpensive concrete blocks work great and they have held up well.
No, we used these simple concrete deck blocks from Lowes. They call that a “12 in. x 8 in. x 12 in. Concrete Patio Pier Block” and the company who makes them is called Headwaters.
They are $6.52 each (as of this writing).

Full disclosure, we did have a few of these where one of the 4 corners broke off as we put the 4×4 posts in the center.
We just got some concrete adhesive (comes in a tube-like silicone) and we just put a little on there and stuck the corners back on and they worked just fine.
Annoying for sure, but still a whole lot easier than digging post holes and pouring concrete!
All told, we spent about $1,600 to build our deck. That included the money I paid Dave for his assistance. So if you are truly doing this on your own, depending on size, you could come in under $1,000!
Thus, building your own deck doesn’t have to break the bank!
But let’s get into how to build a deck step by step with pictures!
How many footings do I need for a deck?
STEP 1 -Placing the concrete blocks
This is the first step in how to build a deck step by step with pictures.
These blocks provide the main support for your deck, so it is crucial that you use enough of them and spread them out evenly to distribute the weight properly.
For the blocks, while they don’t have to be level with each other, you do want them level in general. So if your yard is uneven, be prepared to use a shovel to dig to make the ground flat where you plan to put them.
Again, don’t worry if one is a few inches higher than the other (we’ll get to why in a minute), just make sure they sit level.
At most you want one of these blocks every 5 feet, so we went with 5 feet across but every 3 feet deep from front to back. Here’s what it looked like when we just put the blocks down (we have not yet leveled them).

Next, we began to level those blocks as I mentioned. You can see one near the stairs where we had to use the concrete adhesive to fix a corner.
We simply dug a small amount of dirt away, placed the block down, used a level to check it and that was it. Do note these things are a little heavy, so be prepared to carry one at a time. If you have a wheelbarrow handy (which we did not), that would help!

STEP 2 – Place the support posts in the blocks
The next step was to cut some 4×4 posts to stand in the center of each block and then run some 2″x6″ support boards from left to right. The length of these boards totally depends on how big your deck is.
We used a lot of 16′ ones which we cut a little short, but if you aren’t having to work around an AC unit and some concrete stairs as we did, I wouldn’t cut them at all and would just center the deck to your space.
Don’t have a monster truck to haul 16-foot boards for your how to build a deck step by step project?
Do what I did and rent a flatbed truck (click to reserve it on the Home Depot website at a location near you) from Home Depot for $19 bucks!

Here is why it doesn’t matter if the blocks are at the same height; you simply cut the 4×4 posts to the height you want.
You can get all fancy with laser levels if you want. Or use that string that leaves a chalk mark.
However, all we did was stand the 4×4 posts up gently (since there is nothing keeping them in place yet). Then we stood one of our 2″x8″ support boards (joists) on the top of the end one while one of us held the other end.
Place your level on top of the support board and when it’s level, just use a pencil to mark where the top of the support board is on the other 4×4 posts.
Once your first support board is level then level across for your next support board, leveling across and deep.
Once you get the 4×4 posts set on each end of the support board, go back and put in the ones in between.

What size joists are used for decking?
Joists are the long support boards that run across your deck. The deck boards get attached to these.
Thus these are your primary means of support. In modern construction, these would typically be 16″ apart from one another (from the center of one to the next). In terms of how much weight they can support, you would typically multiply the height of the board (in inches) by 1.5 to determine how many feet it should run in length.
For example, if your joist is a 2″x8″ (as ours were) you would multiply the 8 by 1.5 to determine you should not have it run longer than 12 feet (8 x 1.5 equaling 12).
So before you buy your lumber make sure you know exactly how wide you plan to make your deck and buy the appropriate joists.
Of course, local codes may require something different in your area, so always check with your local code or planning office first.
If you have an HOA they may also require the approval of your plans first as well (which was the case for me).
STEP 3 – ATTACH THE SUPPORT BOARDS
We used these 2″x4″ brackets to attach the support boards to the 4×4 posts. Just use a few nails to hold them in place to the post and attach to the support boards.

While we used hammers if you want to build a deck even quicker, consider buying a nail gun from Amazon Prime!
This nail gun also called a brad nailer, doesn’t require a compressor. It features 4.5 stars on Amazon Prime with almost 300 reviews, so you know this is a great tool!
Ready to build your deck? Jump right to my recommended tools and supplies page (click to see it)! I only recommend the very top-rated tools and items, taking the worry and hassle out of figuring out what to buy.
You can get everything you need quickly and easily by ordering on Amazon or pre-ordering with Lowes or Home Depot and having it ready for pickup.
If you don’t need your deck much off the ground, skip the 4×4 posts and just place the support boards right into the slots on the blocks; even easier!
No need to attach anything the blocks; once you nail the wood together it will be plenty stable and secure!
Talk about how to build a deck step by step with pictures! It doesn’t get much easier than that.
If you go the route of not using the posts, however, you will want to make sure the blocks are level with each other.
Simply rest a support board between 2 or more of the blocks and set your level on top. You’ll see which side needs to go lower and then just dig a little until you are right on the money.
Speaking of money, here’s a money shot of Dave working with the support boards on top of the posts.

Once you have the 4×4 posts attached to the support boards, your foundation is done.
Now you’re more than halfway done in your how to build a deck step by step with pictures project!
STEP 4 – BRACE YOUR SUPPORT BOARDS
With the support boards attached to the posts, they still aren’t that stable.
They are connected to each other, but not across. Now you simply need to cut some more support boards to run in between the long runs.
Simply measure the distance in between the long support boards, and cut additional support boards to that size and nail in place.
Now your deck should start to get pretty stable when you’re done. About every 4 feet should work just fine.
Dave also ran some 2×4‘s from the front center down; that’s what those angled boards are. That just added some extra stability.
Bear in mind most of this appears hidden once your deck boards go on, so it doesn’t have to be pretty!
You’ll notice that Dave added a short section to the front of the deck.
This is basically to have the deck extend a little beyond the first set of posts and blocks; basically to make it look nicer.
We just nailed those small cut boards to the last joist attached to the posts and blocks and then added one more joist on the outside.
But let’s get back to how to build a deck step by step with pictures.

STEP 5 – Attach the decking floorboards
Now all that remains is to put down the deck boards.
You can add stairs depending on the height off the ground and a railing too if needed. But the deck boards will complete the basic deck.
You could stagger the deck boards as you would on a wood floor in your house. I’ve also seen fancy decks where the deck boards were at a 45° angle.
But we simply laid them out even, starting where the deck comes close to the back wall of the house.
Note: we did not put the deck boards touching the house. That allows for rain to flow off the inside edge of the deck. It also allows for the natural movement of the land and house.
Simply lay the deck boards out, side by side and nail them down.
Ideally, get boards that are the right length for your deck. However, if they are a tad long, once they are all nailed in place, mark how much you need to cut with a pencil. Then just come along with a circular saw and cut the ends off.
For a “prettier” look you could also take the time to measure and cut and put the cut side towards the back wall of the house.

How to build a deck around concrete stairs
In the case of our deck, we had some old concrete steps. They came off the back door of the house down to the ground.
We built the deck around them as removing it seemed like a pain. Hopefully, you won’t have to mess with that. But I actually think the end result looks great.
If you do have stairs with a railing, as we did, simply take a grinder and cut the bolts holding the metal railings to the concrete.
Then we built the frame around the steps, which hid the lower steps but utilized the upper ones.
This shot shows you how we worked around the steps. It also shows the frame for the wooden steps we added. The closer to the ground you build a deck, the less of a need you have for steps.

Don’t feel like you have the skill to cut the notched boards for the steps (what they call stringers)? You can buy those pre-cut an Amazon too. Select 3 steps or 4 and it’s done!
Here is what the finished deck looks like!

And with some deck stain added!

For stain, we really wanted the natural wood to come through so we went with a semi-transparent stain. The color was called Harvest Gold from Thompson’s Signature Series.
Deck staining can be a fun and cheap DIY job if you know how to paint and have done it before.
And that completes our how to build a deck step by step with pictures project!!

Sometime in the next 12 months, I hope to put some type of roof or covering over the deck. That way we can use it in the rain and in the scorching heat. I’ll do a new post when that happens!
Ready to build your deck? Grab a copy of the plans (click to download from me) my friend Dave drew up for my deck!
Final thoughts
In this post, I walked you through the exact steps I took with my friend Dave on building my deck.
We had a great time and the deck went up quickly and easily. If you’re looking to learn how to build a deck step by step with pictures, this post should have given you everything you needed.
Have you built one and have tips to share or links to picture?
Ready to build your deck? Jump right to my recommended tools and supplies page (click to see it)! I only recommend the very top-rated tools and items, taking the worry and hassle out of figuring out what to buy.
You can get everything you need quickly and easily by ordering on Amazon or pre-ordering with Lowes or Home Depot and having it ready for pickup.
Not ready to build your deck yet? Why not save this pin to your favorite Pinterest boards so it will be there when you need it? I update it frequently too!
Photo credits (that aren’t mine):
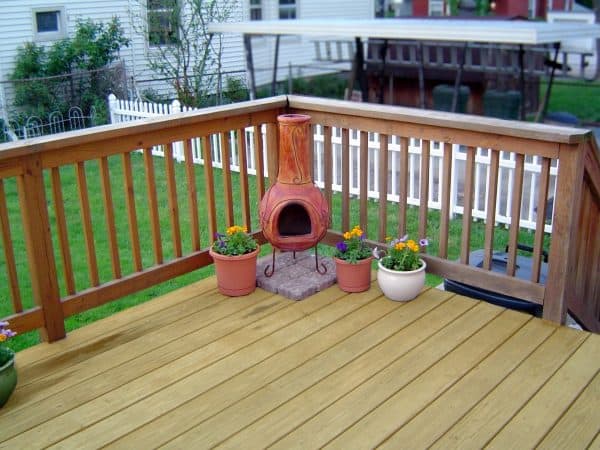
Deck with chiminea – https://www.flickr.com/photos/sonnett/
Middle Class Dad is a participant in the Amazon Services LLC Associates Program, an affiliate advertising program designed to provide a means for sites to earn advertising fees by advertising and linking to Amazon.com. As an Amazon Associate, I may earn a small commission from qualifying purchases if you click to Amazon from my site and choose to make a purchase. This is no way increases the cost to you.
- 17 Simple Leprechaun Trap Ideas Your Kids Will Love! - January 19, 2026
- 15 Refreshing Spring Simmer Pot Recipes to Celebrate the Season - January 9, 2026
- Why Do People Host Using Vrbo Instead of Airbnb? - October 19, 2025
If you don’t feel comfortable marking out your own stringers, go to the Depot, grab your 2x12s, flop the appropriate premade stringer on it and trace it out. Then go home and cut them out. If you aren’t sure how many steps, buy a couple different stringers to use as templates then return them.
Good suggestion!
When you build decks on top of good Solid COncrete do you have to bolt the wood in the concrete or just build the deck on top of the concrete and the weight won’t shift the deck.
Hi John
Great question! Bear in mind I haven’t done this, but I think the right way to do it would be to anchor it to the concrete at least in the corners of the deck. But if it wasn’t elevated and just sitting right above the concrete I do think the weight of the structure would keep it from moving. I for sure would anchor it if it’s going to be 2 feet or more off the concrete.
Hope that helps!
Jeff
What is the full size of this floating deck that you made?
Hi Ben
At this point, I’ve built, helped build, or in the most recent instance hired someone to build a deck a total of 3 times. But I wrote this article after building my 1st one. I don’t live in that house anymore. But it was about 10′ deep by 20′ wide.
Thanks for being here!
Jeff
I didn’t see where you addressed ground settling issues. Did you have any trouble with the concrete blocks settling making the deck to become unlevel?
Thanks
Hi Bob
Maybe that will happen eventually, but we did not encounter that. I moved from that house about a year and a half ago, but at the time we left, the deck was still perfectly level and had been ever since we built it about 2 years prior.
At my new house, we re-did my deck and also used those, in conjunction with a little poured concrete as we also put a tiny home on the far end of the deck and wanted to make sure it could take the weight. But generally (and bear in mind I’m not a contractor or engineer), I feel like if the ground is unstable enough to offset those deck blocks, it probably would affect poured concrete too unless you dug really deep to create your concrete holes.
Good question. Have you seen that before?
Cheers, Jeff
Hi Jeff,
Great work! The one question I have is what did you do with the lawn under the deck? It didn’t look like you removed any of the grass in the area where it was built. Also I’d be concerned with weeds growing under there over the long run and eventually growing through the open spaces. Did you do anything to take care of that?
Hi Alvin
Great question! I did not remove any grass other than where the concrete blocks went. The grass mostly died due to lack of sun and minimal water hitting it. But the grass closest to the edge of the deck kept growing but was easy to cut back when I mowed the lawn. My weedeater worked a little better.
The only other thing I didn’t anticipate were wasps building nests under there which were sometimes hard to reach without leaving room to get out quickly once I sprayed them (but I never got stung!)
Thanks for asking!
Jeff
Good pictures – they really help. Thanks for the post
Thanks, Marian
I’m not a professional photographer (clearly), but I wanted to do my best to document the deck we built so anyone could duplicate our work.
Thanks for being here!
Jeff
Does building over old cement with some cracks work? It’s a sort of corner property where the old (28 years)15’X15 gazebo will be torn down due to termites.
Hi Ralph
Thanks for taking the time to comment. With my deck, we built around, and partially covered some old concrete stairs and it worked really well. I wouldn’t be too concerned with small cracks in your old foundation as long as the concrete is level and not crumbling or otherwise unstable. You should be able to set one of those concrete deck blocks right on the foundation and that should be totally solid as long as the foundation is solid.
If the old foundation is crumbling and seems to be starting to fall apart, I’d probably rent a jackhammer from Home Depot and chisel away at least the parts of it where you want your deck blocks to go. Ultimately if you’re completely covering it with the new deck if parts of it are still there underneath no one will see it so I wouldn’t necessarily remove the whole thing.
I hope that helps!
Thanks for the question.
Jeff
I see you don’t monetize your page. You can earn extra passive income,
your niche is good for one method, just search in google; website monetization methods
by Riggso
Thanks Riggso
I do have generally 2 or maybe 3 ads per post and a sidebar ad as well as the occasional affiliate link. But you’re correct in that thus far, it has not really monetized by much.
I don’t like sites that are overblown with ads as I feel it detracts and makes the content hard to read. If you have any specific suggestions, feel free to comment back or email me!
Thanks for being here.
Jeff
Great post!
Thank you Nicholas!
I appreciate your support!
Jeff
When I built my deck a number of years ago. Deck screws were the IN thing. Now I Read I should have used GREEN deck screws. As a matter of fact one lumber yard help advises that GREEN will be out and BROWN will be the norm for pressure treated structures!
There is a thought for a new article.
Thanks, Glenn
Good food for thought! I honestly didn’t give much thought to the type of deck screws we used. I’ll have to dig in.
Thanks!
Jeff