
Bullnose corners are rounded corners and if you’re painting them different colors, it can be really tricky. I needed to do some painting and wondered how to paint walls with bullnose corners.
To paint a wall with bullnose or rounded corners, you can either have the primary color go all the way around the curve to where the next wall’s flat part starts and place your painter’s tape there, or, with a good eye, you can run your painter’s tape down the center of the curve and split the colors evenly.
But there’s a lot more that goes into painting rounded corners, so let’s dig in a little further.
What is a bullnose corner?
Bullnose corners are rounded corners on the edges of walls when going from one wall to another.
Originally they were primarily used in concrete and adobe structures where perfect 90° angled walls were hard to do. But these days, they have actually come into popularity with drywall in homes.
Bullnose or rounded corners, give a home a more polished look and have become quite popular.
How to add bullnose corners to a house
When the walls and sheetrock have just gone in on a house, it’s easy to add bullnose corners.
Typically where 2 pieces of sheetrock (drywall) meet at a corner, you would attach what’s called a bead. A bead is essentially a piece of metal, plastic, or vinyl that is a perfect 90° angle.
You add a coat of joint compound on the sheetrock and then place it at the corner where the 2 pieces of drywall meet. Nail or staple it into place. Then you simply add a topcoat of joint compound to get it ready to paint.
For bullnose corners, you simply buy a bullnose bead instead of a regular 90° angle bead, but the installation is exactly the same.
If, however, you want to add bullnose corners to an existing house, you’ll need to remove the existing bead and baseboards, sand the joint down and apply the bullnose bead as I outlined above.
Then you’ll need to replace the baseboards with new ones that can accommodate the bullnose.
How to paint a corner where two colors meet

First things first. Since these colors will be seen at the same time, make sure they look good together.
Then decide which wall and color is the most important and least important (primary and secondary).
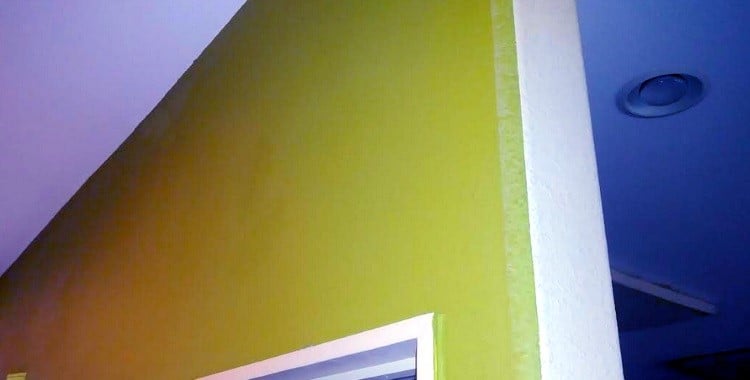
It might not seem like it would matter, but we’re not going to paint on the rounded part, we’re going all the way around the corner to the next wall for our line. Thus, it’s important to have 1 color and wall as the primary.
Once you know your primary and secondary walls, run a line of painter’s tape from top to bottom on the secondary wall around the corner from the primary wall.
You want the tape to be right where the rounded corner stops, so probably not much more than 1/2 inch onto the secondary wall. Line the edge of the tape up so you can paint the primary wall and have that color around the corner right to where it gets flat.
Paint as many coats as you need to and then allow to dry fully. Then run a new strip of paint on the newly painted wall right to the edge of the new color. Then paint your secondary wall.
How to paint walls with curved edges on the center of the curve
If the idea of having your primary color bleed into the room or section where the secondary color is driving you crazy and you insist on painting down the center of the bullnose, follow these tips.
Again use painter’s tape to run a line of tape from top to bottom, but this time down the exact center of your rounded corner.
From almost any amount of distance, this will fool the eye into making it look like a 90° angle.
The hard part here is getting the tape in exactly the right place all the way up and down. But once you have the tape in place, the painting process is simple and exactly the same as the above section.
How to paint a wall two different colors divided
Sometimes you just want 2 different colors in a room where there isn’t a rounded corner.
Let’s say, for instance, you want a faux beadboard look in a dining room. Sometimes called wainscoting, beadboard is simply paneling that goes up a wall from the baseboards, usually 3′ or maybe 4 feet up max.
It’s a classic look, hundreds of years old, and also an easy way to cover damaged walls.
But if you just want to simulate that with paint, it’s easy! Decide how far up the wall from the baseboards you want to go and mark with a pencil, using a tape measure, about 2 feet or so across the wall.
Then come back painter’s tape and run all the way across the wall to protect the top part of the wall.
Then simply paint the lower part of the wall being sure not to go all the way past your painter’s tape.
If you are painting both sections of the wall, do one first, allow to dry and then run more painter’s tape at the edge of the newly painted part and paint the other section.
The easiest way to paint a straight line
Most of us simply don’t possess a steady enough hand to paint a perfectly straight line. If you do, that’s awesome!
For the rest of us, painter’s tape is the best way to go in terms of getting a clean, crisp perfectly straight line.
As an added measure you can first mark in pencil using a tape measure and then come back with a level, straight edge or yardstick and draw a perfectly straight line to match your painter’s tape to.
Sometimes getting the painter’s tape down perfectly is a little tricky.
The good news is that painter’s tape is easy to work with and easy to peel off and reapply. Do make a point of getting GOOD painter’s tape. This is not the place to cut corners and just get whatever’s cheapest.
Cheap painter’s tape will bleed through, especially if your walls have a lot of texture on them.
How to paint a straight line on heavily textured walls
Textured walls look awesome!
But for DIY handymen and women, they can be a bit of a pain. For one they make using a stud finder a lot harder as all the bumps set off the little magnet. But they also make painting straight lines a lot harder too.
But let’s say, for instance, you want to paint your walls one color and your ceiling another but there’s a lot of texture (at least on the walls).
Paint the ceiling first and allow to dry.
Then put down painter’s tape on the ceiling where the wall meets the ceiling. Then paint a small amount of your ceiling paint on the walls lapping onto the painter’s tape a little.
I know we’ll be painting the walls a different color, but this trick allows your ceiling paint to seep under the edges of the tape that where the bumps of texture would normally allow your wall paint to go.
Because it’s the ceiling color, it blends into the ceiling, but when you allow to dry and then go back and cleanly paint the wall color up to the edge of the painter’s tape, it will create a much more precise and straight line.
Final Thoughts
In this post, I took a look at the world of painting walls. Specifically, we looked at painting 2 different walls 2 different colors when they have a rounded (bullnose) corner between them.
While it’s not hard to paint, it can be hard to get the color break between the walls to actually look good.
So I walked us through everything I’ve learned from doing a lot of painting in my current house and the last house we had, both of which had bullnose corners.
Now that you know how to paint walls with bullnose corners, time to get out the brushes!

- 201 Great Father’s Day Quotes to Inspire and Empower Him - May 12, 2026
- 179 Happy Mother’s Day Quotes for Mom in 2026 - April 20, 2026
- 17 Simple Leprechaun Trap Ideas Your Kids Will Love! - January 19, 2026